


If you are a videographer or a content creator, you probably heard of video rendering before. For those of you who have not, it refers to a process where the computer system methodically converts source material into a final display. One of the first steps as a beginner video editor is to learn how to render video in Premiere Pro.
Video rendering is when the computer processes information from a coded data source and transforms that data to produce an image. The code may consist of a set of instructions on how to frame images for playing back a movie, or to create a custom image like a webpage.
Video rendering is known to be a demanding process for any hardware. There are a lot of actions that take place in real-time to render a video. In order to produce a final video production, video, audio and animated effects all have to go in the rendering process.
Real time vs. advanced
There are two types of video rendering – Real Time and Advanced. Real time rendering is very self explanatory and will continuously happen while you work, much like a preview.
However, the computer, even with enough RAM, can only render so much content in real time. Some content may contain too much data and complexity. For example, the animated movies created by Pixar or Dreamworks contain heavy content that cannot be processed in real time on a computer. In this case, the content renders in advance.
Motion graphics vs. 3D and render resolution
The rendering process isn’t limited to videos. Computers can also render motion graphics and 3D graphics. Firstly, motion graphics is usually involves 2D objects and animtion, whereas 3D literally contains any objects or space in three dimensional.
The resolution of a render determines quality. If you decide to set a render resolution to 1080 and native resolution to 4k, this would enable UI to be displayed at 4k whilst game models would be rendered in 1080.
Why Premiere Pro?
There are a wide variety of video editing softwares. You could easily find online video editors or other softwares that offer video rendering services. However, most videographers and video editors use Adobe Premiere Pro since they are easy to use and highly sophisticated.
Adobe Premiere Pro is an industry leading video editing software that allows you to edit and create professional productions. They offer countless tools and features that beginners, in particular, can greatly benefit from in creating and refining their video projects.
How to render video in Premiere Pro
Premiere Pro keeps the file size small and manageable so that it would not overwork your computer when you try to render. However, this may cause problems when you want playback of the video project. Make sure to work on Premiere Pro full screen so that you can keep on eye on the entire rendering process!
How to render video

- Go the File at the top, then go to Export and then Media… This will bring up the video Export Settings menu.
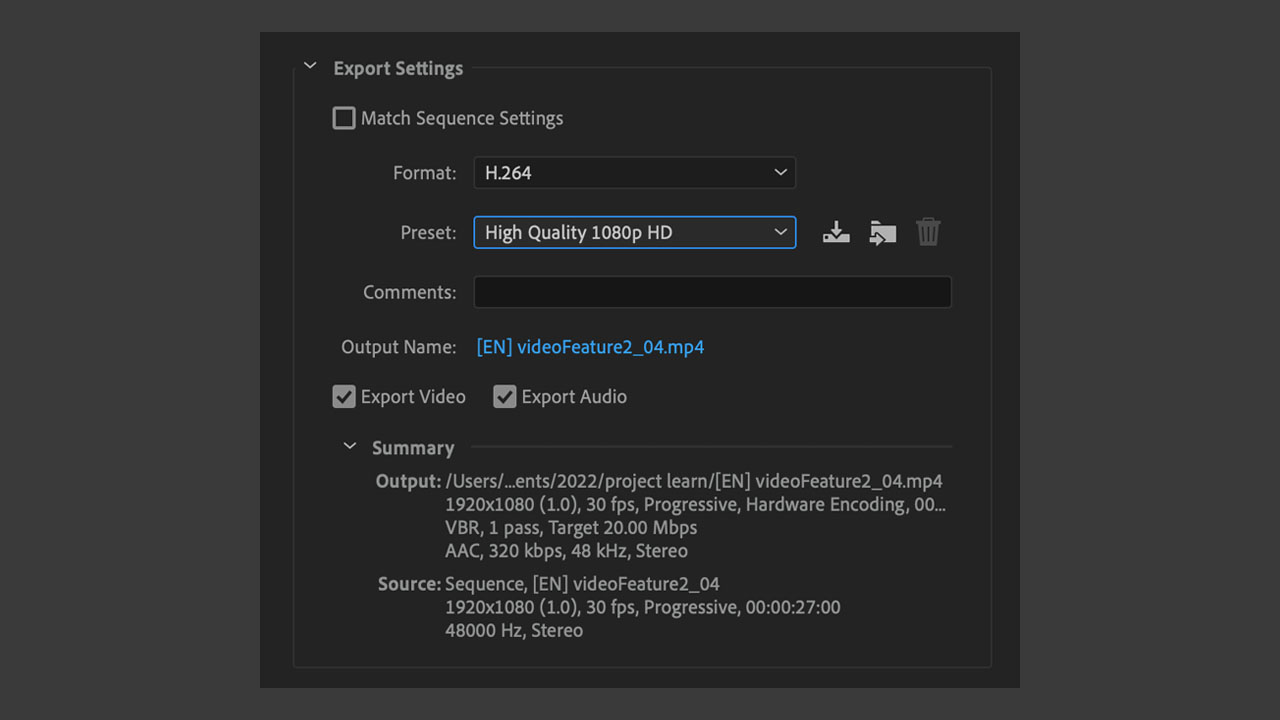
- Go over to Format and select H.264.
- Go to Preset and select High Quality 1080p HD.
These settings above will make sure that your video renders at the standard quality necessary for both enjoyment and any online platform where you want to upload your video.
- Click on Output Name to name your video and select where you want to save it on your desktop device.
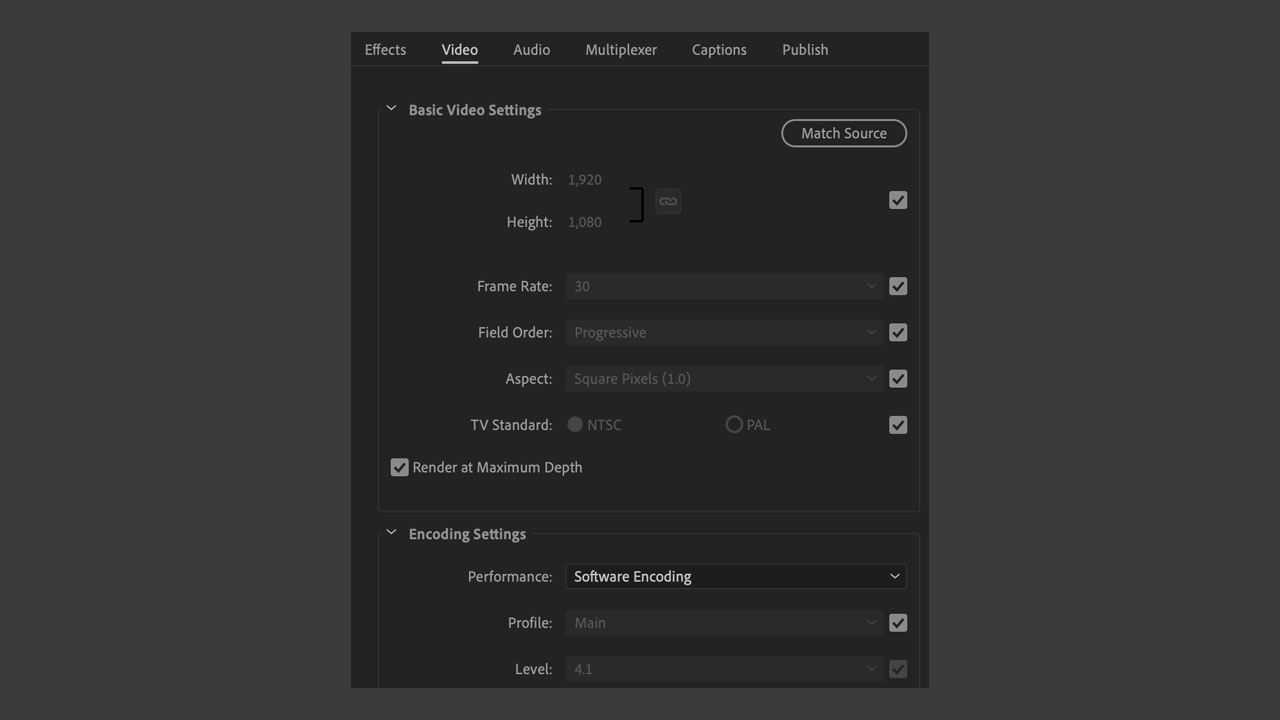
- Next, click on the Video tab close to the bottom to open up a menu that will give you a few more options we need to check.
This is usually used by more advanced video creators but we’ll briefly go through it to make sure you don’t have the wrong settings checked.
Most of the settings in this section should already be optimal since we selected the High Quality 1080p HD preset earlier, but just incase, your settings should be same as above with the exception of the Width and Height as this depends on the dimensions of your video.
- Check the Render at Maximum Depth box. This will increase the quality.
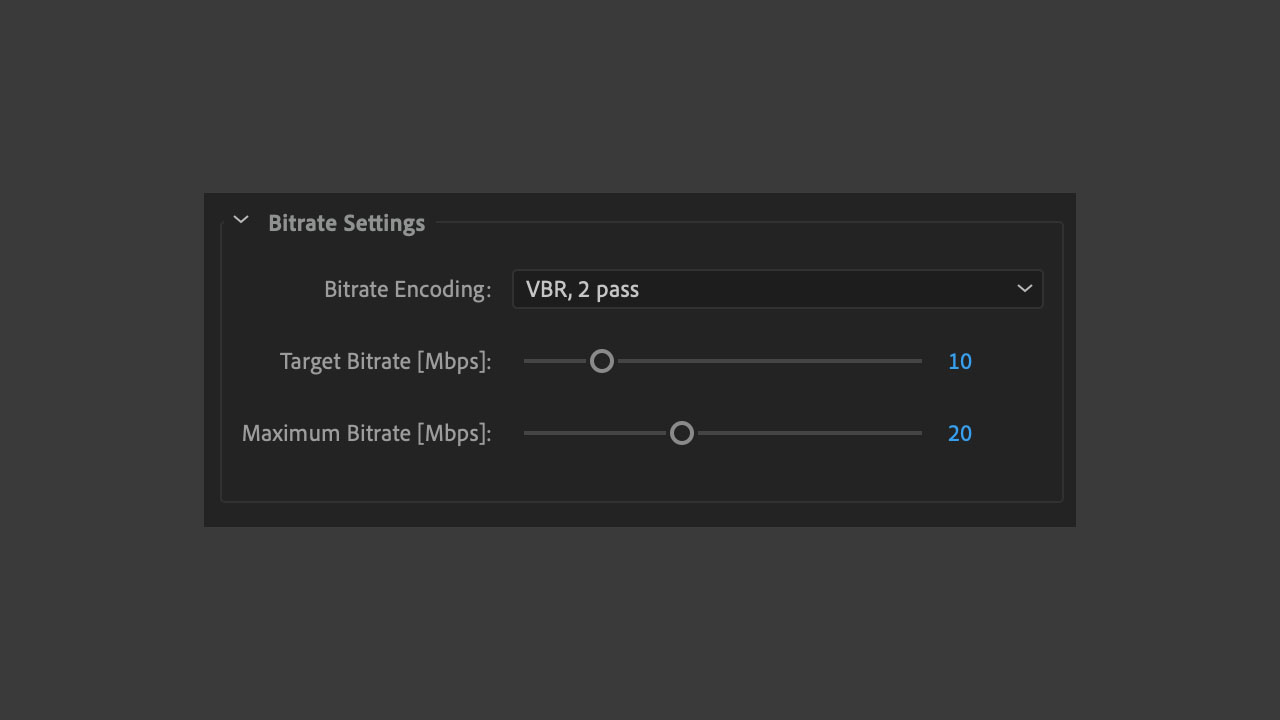
- Skip the rest of the settings and look at the Bitrate Settings and copy the settings above.
- Bitrate Encoding: VBR, 2 pass
- Target Bitrate [Mbps]: 10
- Maximum Bitrate [Mbps]: 20
Your default Bitrate Encoding is probably on VBR, 1 pass because of the preset we selected earlier, which is totally fine. However, you can use these bitrate settings to make your video more optimized for uploading on online platforms such as YouTube or Facebook.
This will increase the memory size of your video however, so if this is something you’re very conscious of then you can skip all of this.
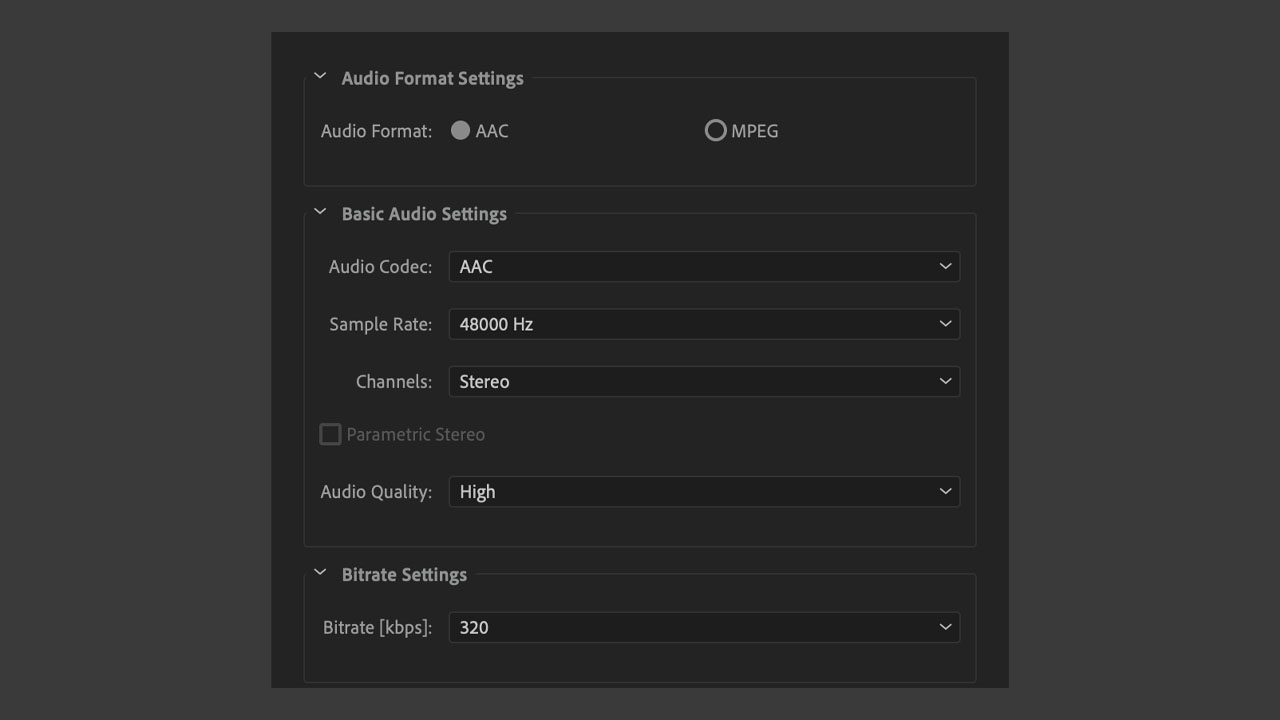
- Audio settings are the last settings to check. Make sure that:
- Audio Format: AAC
- Audio Codec: AAC
- Sample Rate: 48000 Hz
- Channels: Stereo
- Audio Quality: High
- Bitrate [kbps]: 320
Your audio should already have all of these setting selected by default but it’s good to mention just in case.
- Check the Use Maximum Render Quality box at the bottom of the render settings window.
- Finally, hit Export at the bottom to render your video!
Now that you learned how to render video in Premiere, try to export your file. You could easily export your video straight from Premiere Pro. However, if you are looking to change the file format for social upload or for any other reason, try to use Adobe Media Encoder. It can be used simultaneously with Premiere Pro while projects are being encoded.