In a groundbreaking moment in the world of technology, remember those mesmerizing scenes from science fiction where characters effortlessly replicated their voices? Prepare to be in awe as we introduce Typecast’s latest innovation: Voice Cloning.
Formerly known as ‘My Voice Maker’ during its beta phase, this feature is now officially launched, with the promise of revolutionizing how we harness the power of AI speech and AI voice technology.
In this post, I’ll show you how easy it is to create your own TTS with Voice Cloning!
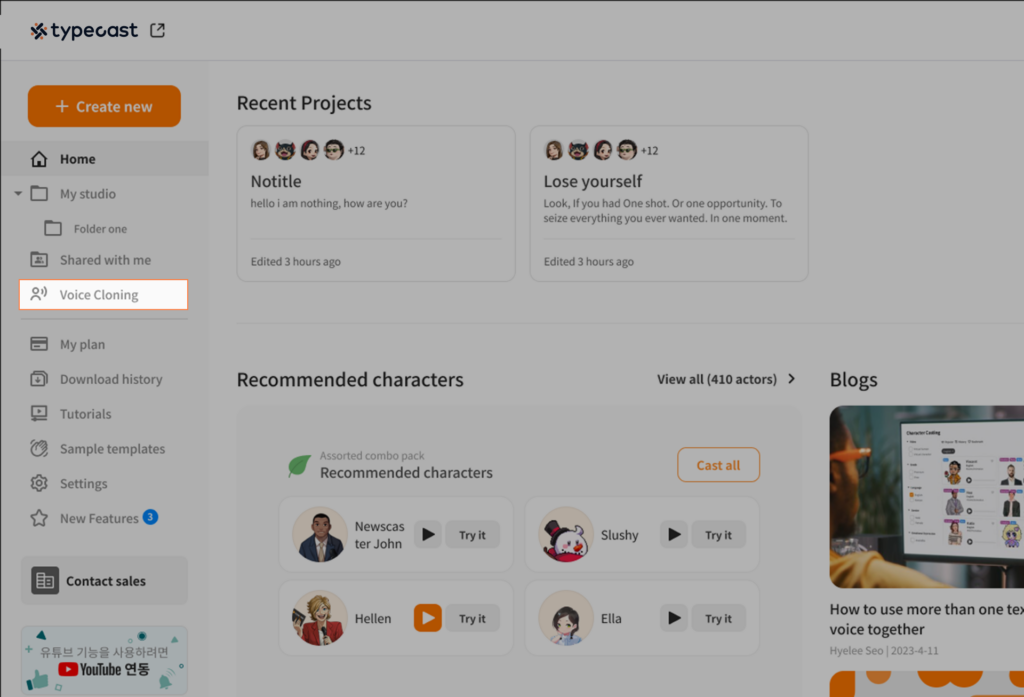
- After logging into Typecast, please click on the ‘Voice Cloning’ section that you see first on the screen.
- Login
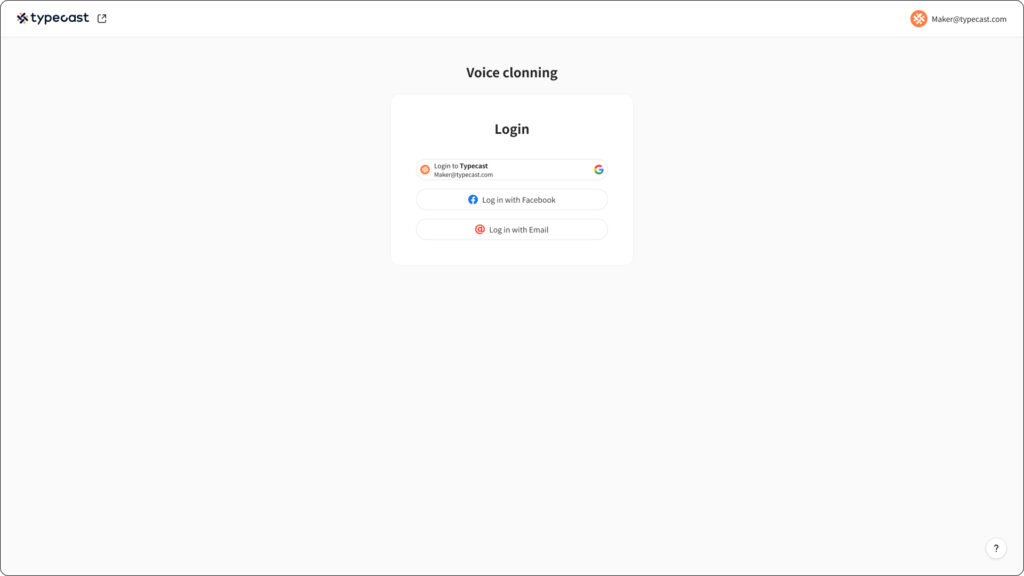
Click the login button to log in. Currently, Voice Cloning is only available to Typecast Pro and Business Plan users.
- Welcome to Voice Cloning, where you can create your own AI voice!
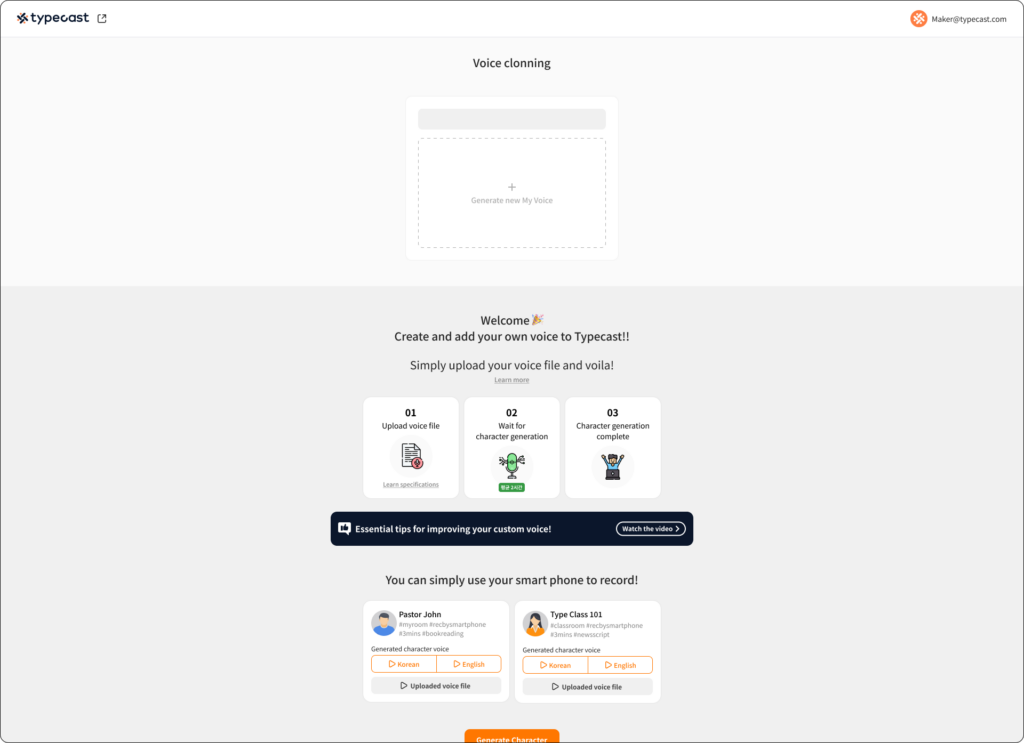
There are simple ways to create custom voices and voice file references! If you’ve explored it thoroughly, why not press the [+] button now to create your very own unique AI voice?
- Custom voice generation guide
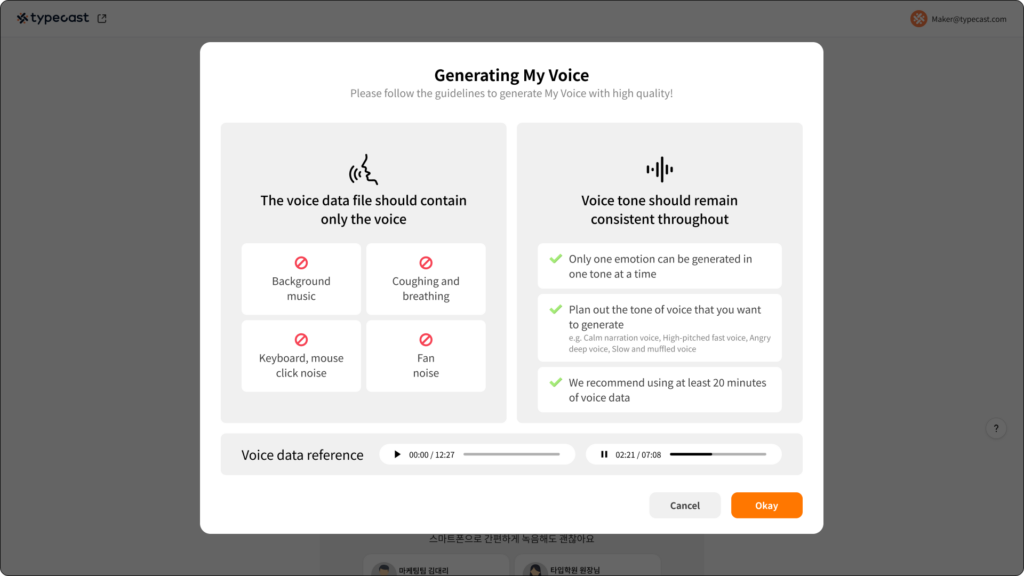
- Our custom voice generation guide has been created to help you produce high-quality custom voices. By following this guide, you can achieve even more satisfying results in terms of quality.
- If you’re unsure about which file to upload, we recommend listening to the provided voice file reference.
- Let’s generate a new custom voice: Fill out the Custom Voice Information
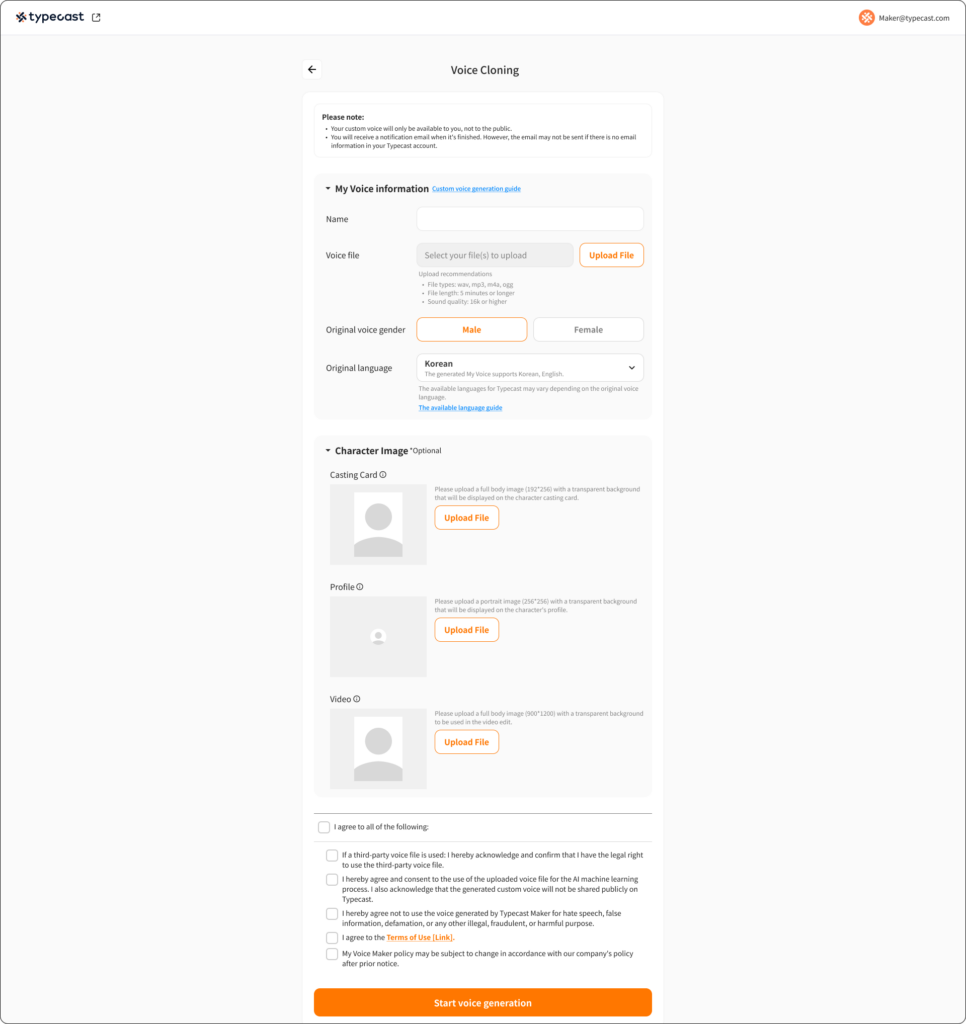
- Name: After completing the custom voice generation process, you will be able to select the character with that name in Typecast for use.
- Please select the original voice gender and language of the original audio file, and then upload the voice file.
- You can upload files that range from a minimum of 5 minutes to approximately 2 hours. There’s no fixed script! If you already have an audio file, feel free to upload it as is.
- Custom voices are generated in the chosen language, and currently, we support English, Spanish, Korean, Japanese, and German. More languages will be supported soon! Languages that can be generated may vary depending on the original language of the voice file.
- Uploading an image is optional. If you upload an image, it will be displayed as the character in Typecast’s character casting page, video editing features, and character profile image. If you don’t upload an image, the default image will be displayed.
- If you’re unsure about what image to upload, click the [!] icon next to the casting card. You can see examples of character images.
- Please refer to each description for recommended guidelines on uploading character images.
- Generating a custom voice
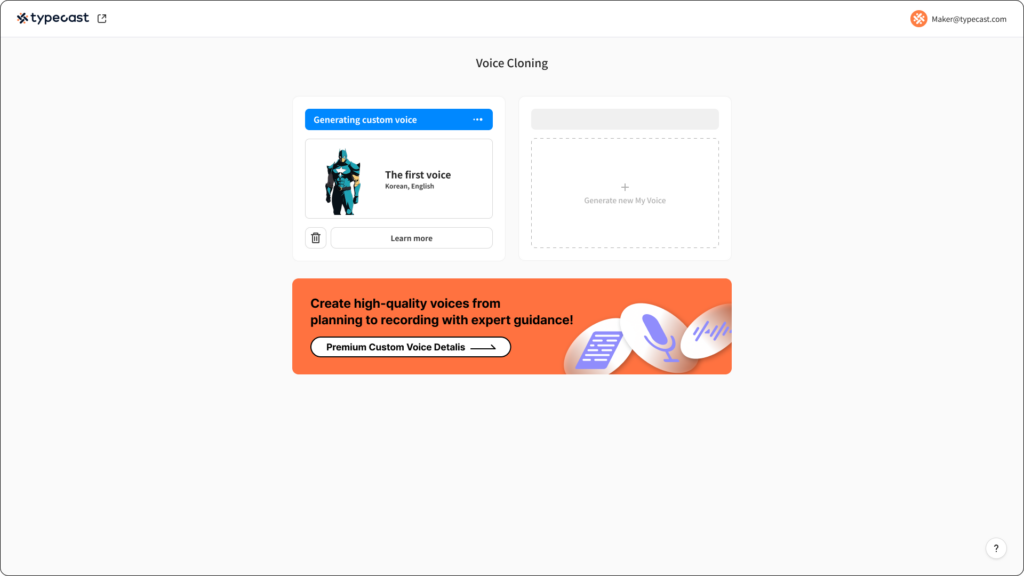
- Once you’ve provided the information above and completed the file upload, it’s time for Typecast to take care of your custom voice!
- Click [View details] to review the information you entered before creating the custom voice, and you can also delete the custom voice if needed.
- Next to [View details], you’ll find a trashcan icon to delete the custom voice that’s in progress. (Please note that once deleted, the information for the custom voice cannot be recovered!) In case of errors during the AI learning process or when AI learning is completed, we will send a notification email to the email associated with your login account.
- Custom voice generation failed
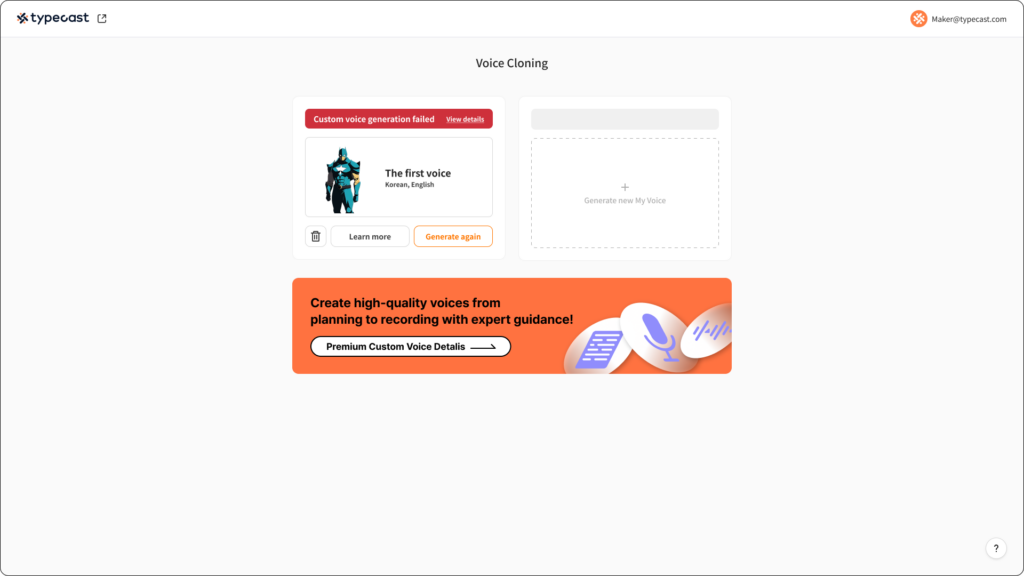
- What if custom voice generation fails? Don’t worry, check the [Issue report]. In case of a failed custom voice generation, we’ll send you an instructional email to the email address you used to log in.
- Most learning failures are likely due to issues with the voice file, so in such cases, we recommend clicking [Generate again] and uploading a new voice file for the AI learning process.
- We suggest removing noise from the audio or using a file with consistent audio quality for another attempt.
- If you wish to create a different custom voice, you can delete the custom voice in progress by clicking the trashcan icon next to [View details]. (Please note that information for deleted custom voices cannot be recovered!)
- Custom voice generation complete
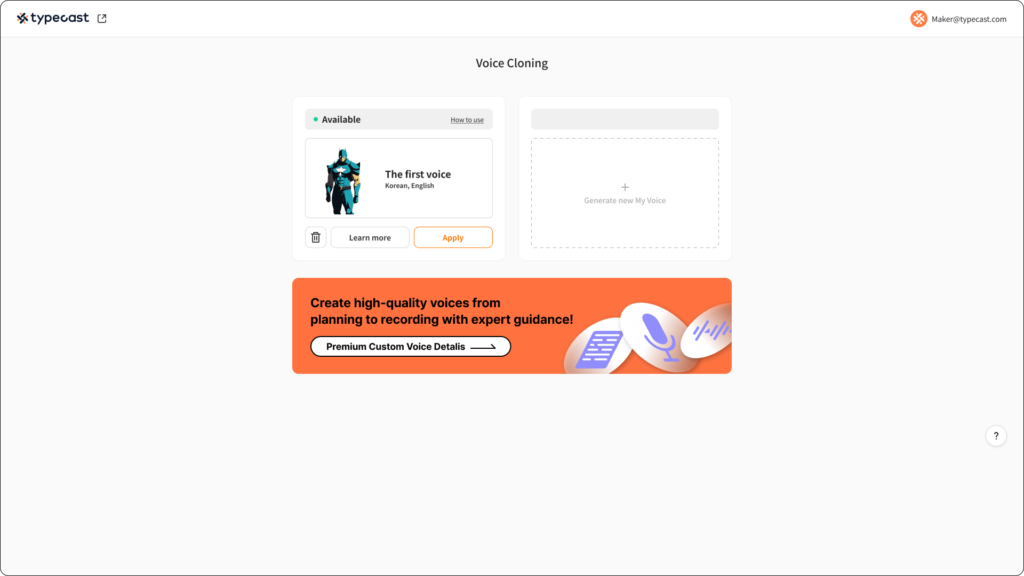
- Are you ready to use your one-of-a-kind custom voice now?
- Once the custom voice generation is complete, you can see your created custom voice by checking the [Custom] option on Typecast’s character casting page. Once the custom voice generation is complete, we’ll send you a notification to your login account email. Click the [Apply] button to enter Typecast’s character casting page, and there you have it – your very own AI voice! You can check and start using your custom voice right away.
- Delete custom voice
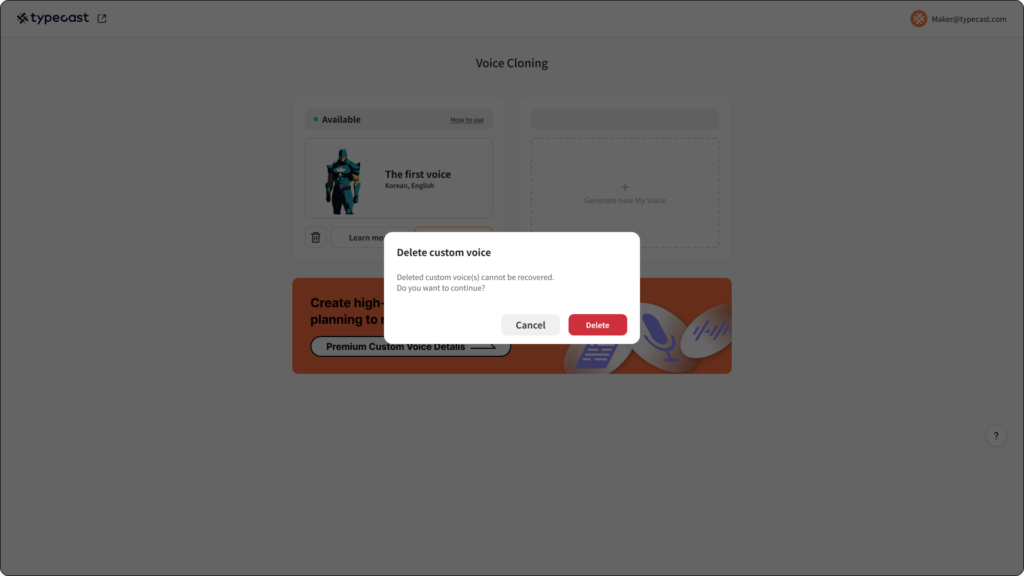
- After generating a custom voice, if you wish to create a new custom voice with a different voice, please delete the previously generated custom voice first.
- Be cautious! Once you delete an existing custom voice, it cannot be recovered! (Currently, Pro plan users can create one custom voice for free, while Business plan users can create two custom voices for free and have the option to purchase more.)
- If automatic subscription renewal isn’t extended due to regular payment errors or similar issues, it can be recovered. When you delete a custom voice, you’ll be redirected to the initial page of Voice Cloning.
Do you still think of AI voices as those robotic customer service messages? Well, guess what? AI voices have gone mainstream on platforms like YouTube, Instagram, TikTok, and more. Creators all around love them! They’re available for people of all ages, anytime, anywhere.
So, why not jump on the bandwagon and give them a try? And here’s the kicker: You can make your own voice sound like an AI voice, just for your personal use! Simply type in your text, and voila, you’ve got yourself an audio file ready to go.
Now, even on days when you’re not feeling your best, your voice stays top-notch.
Don’t wait! Go ahead, give Typecast Voice Cloning a try right now!
