


Are you trying to make video content with AI voice overs created from an online text to speech service?
This question doesn’t really have a straightforward answer mostly because there are so many video programs and software out there such as Final Cut and Adobe Premier.
But, a lot of these video programs have many similarities to each other, such as functions that involve importing and exporting files, as well as some editing tools which we will need for this guide.
Pretty handy if you need to make any content for product marketing or social media!
Please note that if you have already done any of these steps then you can just skip to the ones that are relevant to you.
1. Exporting the AI voice over
First thing we need to do is export the audio file from the text to speech service we’re using.
Most, if not all, text to speech services allow you to download the voice-over, usually as an MP3 or WAV.
We will use our own voice generator in Typecast as an example.
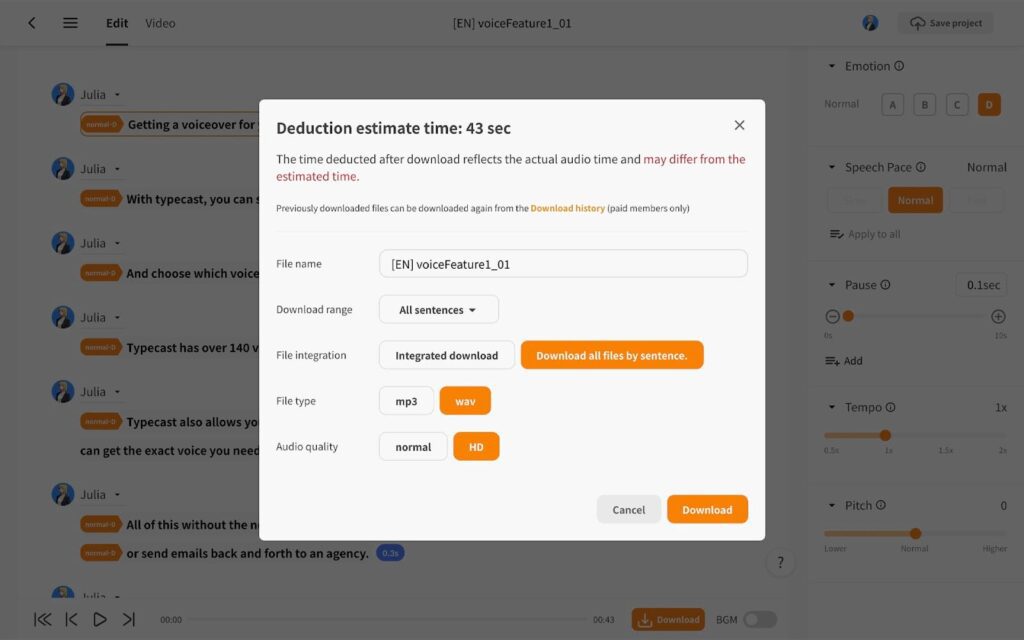
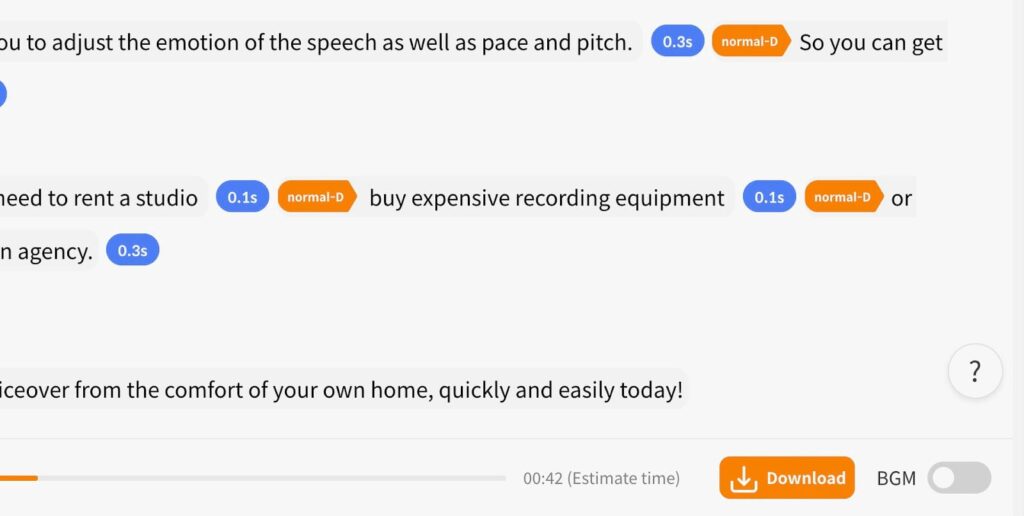
In Typecast, after creating your AI voice-over, you can click on the download button which will bring up a download menu.
Here you can customize the way you want to download the audio file.
For me, when I’m downloading audio for my videos, I will usually choose to download in WAV file format because the audio is uncompressed which means higher quality.
But be aware that you will get a larger file size when choosing WAV. For a smaller audio compressed file with slightly less quality, choose MP3 instead.
2. Setting up your video project
As I mentioned before, most video editing software have the same features and functions. I will be using Adobe Premiere on Mac but the process will be very similar in other programmes running on Windows.
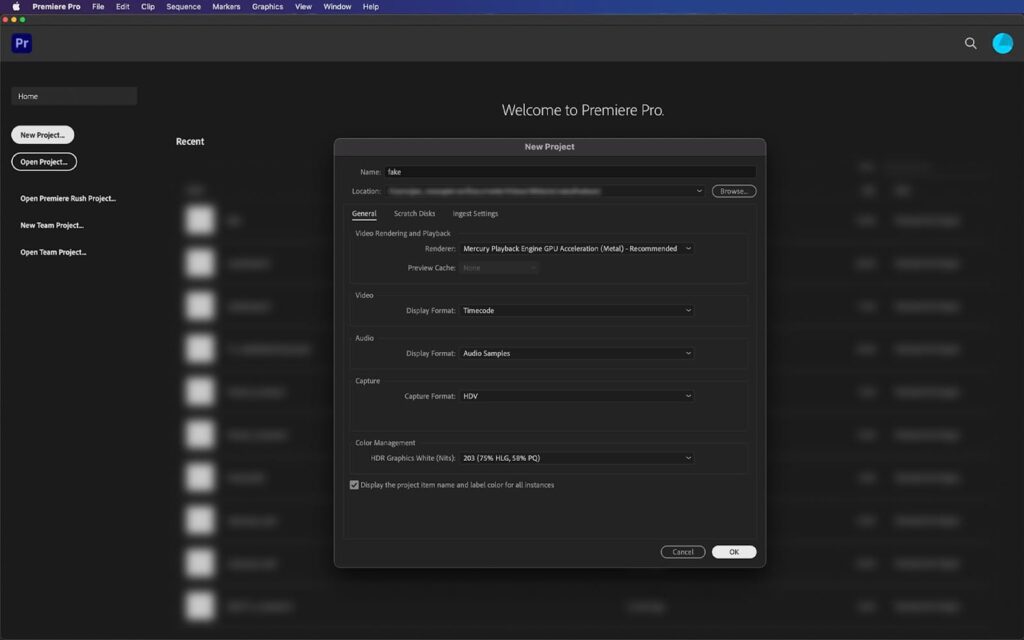
First, we can start by clicking on New Project… on the left hand side. That will bring up a pop-up menu.
All you need to do is give your project a name and a location on your PC/laptop where you would live to save the project.
Once that’s done, hit OK.

3. Importing your video
With that done, you’ll be taken to your project workspace. Your setup may look different depending on which workspace or video software you’re using.
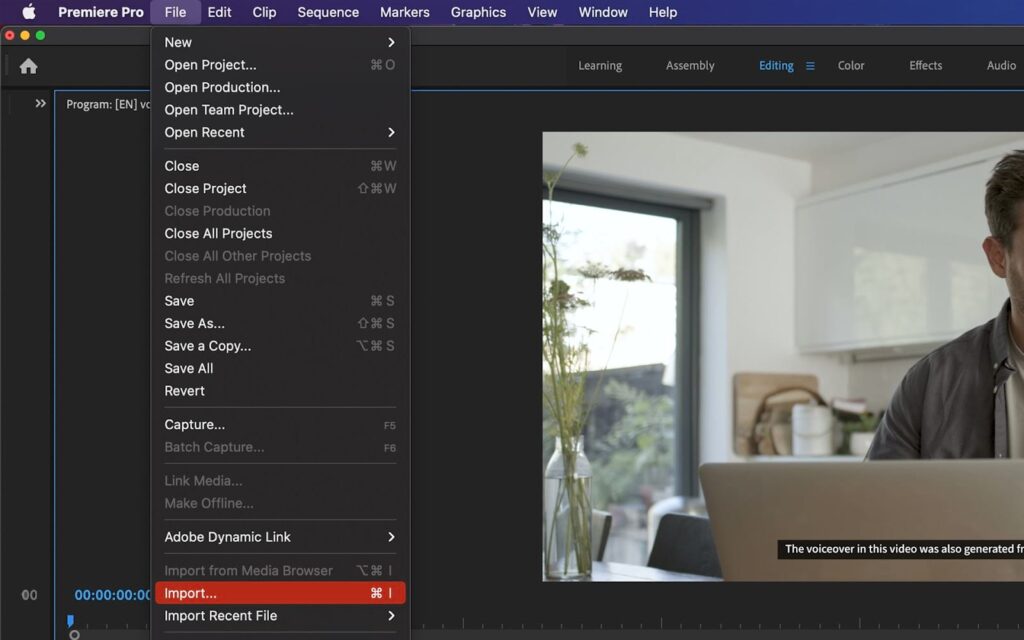
To get our video into the project, click on File and then Import… in the drop down menu.
Alternatively, you can press ⌘ + I if you’re using Mac, or CTRL + I on Windows.
Find your video and select. Your video should now be imported.
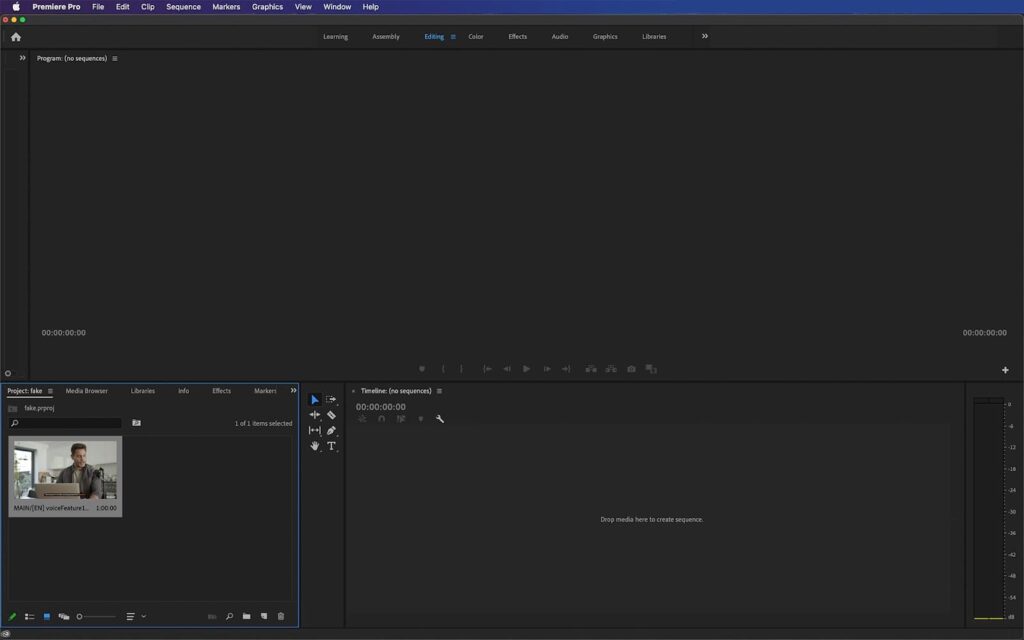
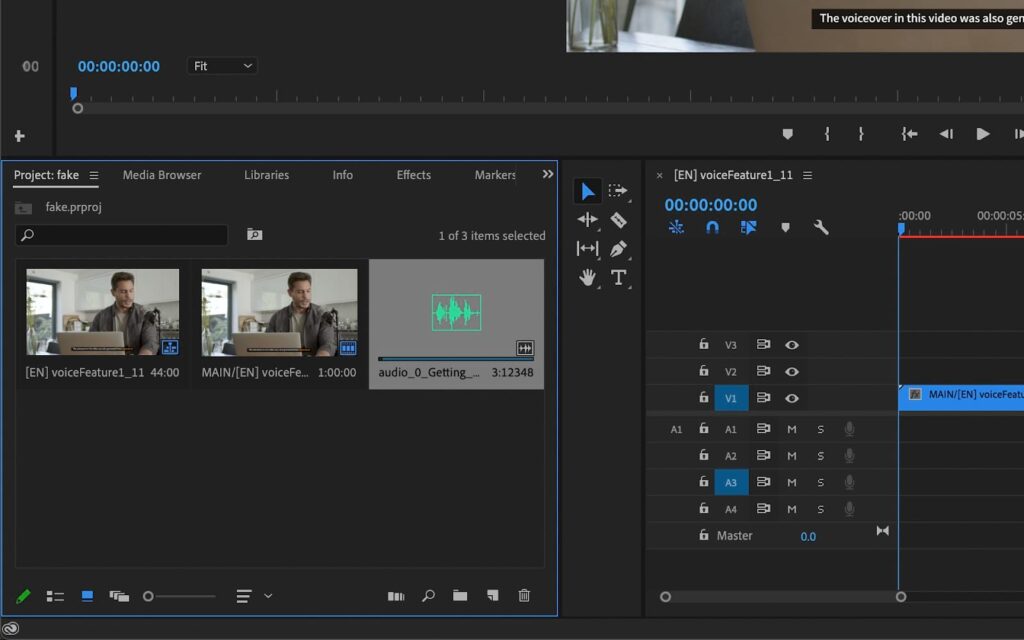
Your video footage will now appear in your Project folder. To actually start using that footage you need to click and drag the footage into your Timeline on the right.
As you drag the footage into your Timeline it will turn into a colored bar (blue for me), and slot into the video channel.
Now your footage is in your video project and ready to be used.
4. Importing the AI voice over into your video project
Now the main reason why you’re here, importing the AI voiceover software audio file into your video project.
As we did previously when importing our video footage, we need to do the same again for the audio file that has the AI voice-over.
Again, click on File and then Import… in the drop down menu or press ⌘ + I if you’re using Mac (CTRL + I on Windows).
Just find the audio file you downloaded and click on that to import it.
5. Add the voice-over audio file into your video project
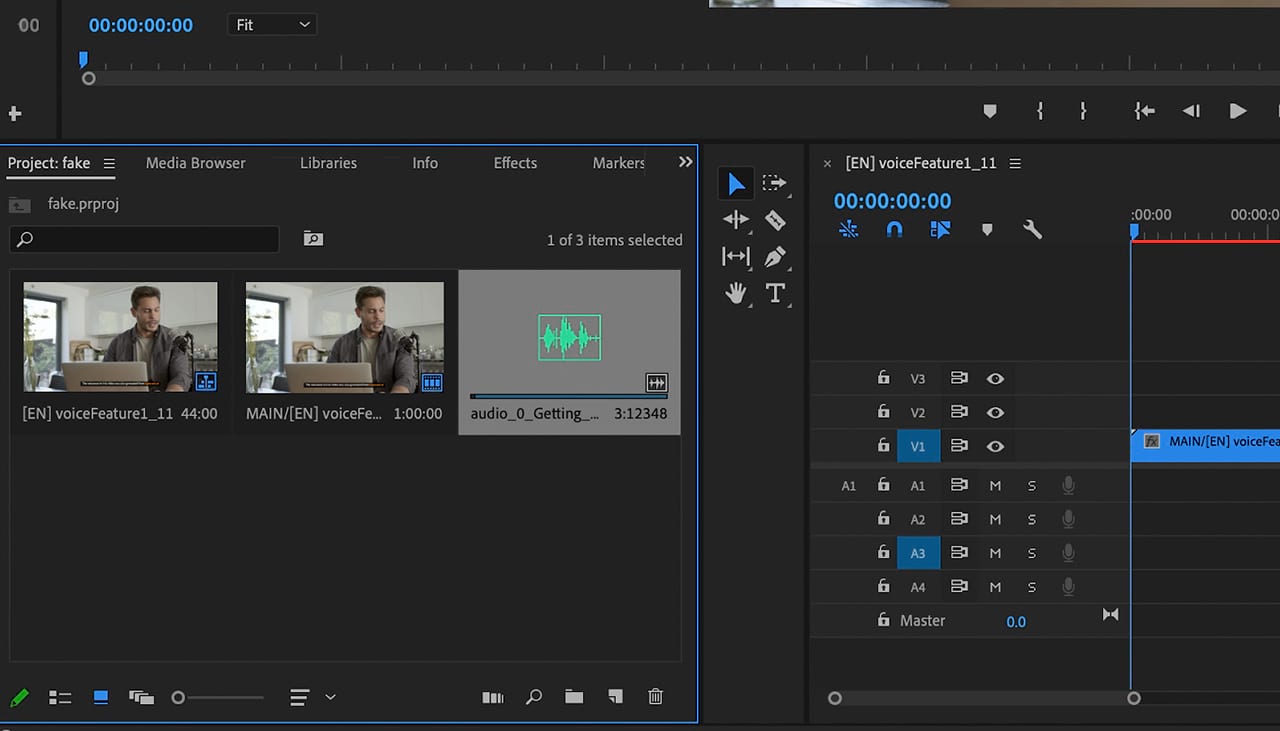
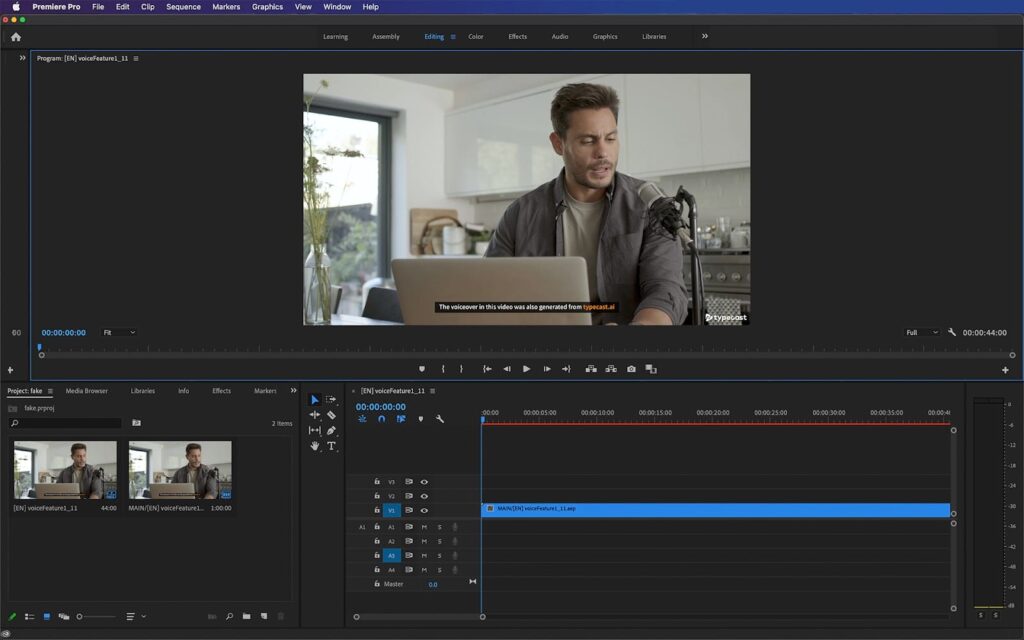
Once you import the audio file it will be added into your Project folder. Click and drag the audio file into your Timeline like before with the video footage.
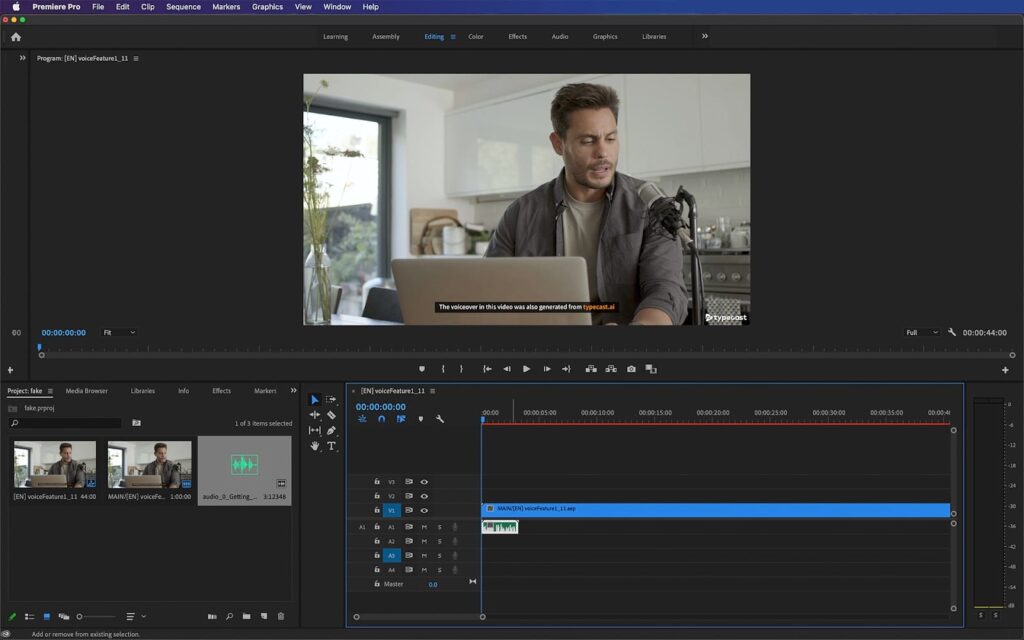
As you can see, the audio file is nested in the audio channel located under the video channel. This means you’ve successfully added your AI voice to your video.

6. Editing + cutting the audio (optional)
If you’re wondering how to time the voice with the video then all you need to do is drag the audio file along the timeline until it’s at the time desired.
If you have a long audio file and want to cut it up to match each part separately with the video then just click on the timeline where you want to cut the audio.
For example, as you can see in the screenshot above, I want to cut the audio in half at timestamp 00:00:14:12.
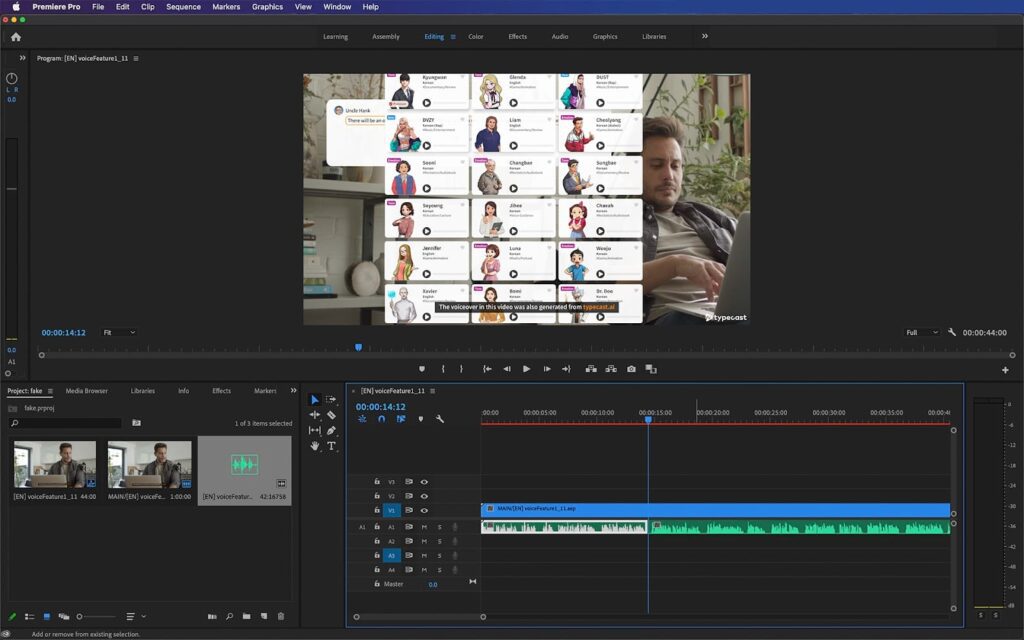
Then, just press ⌘ + K if you’re using Mac (CTRL + K on Windows), to cut the audio.
Now you have separated audio to work with. You can do this however much you like in order to get the audio/video timing right for you.
You can even add more audio files like sound effects or some background music to make the video more interesting.
7. Exporting the video, ready to use!
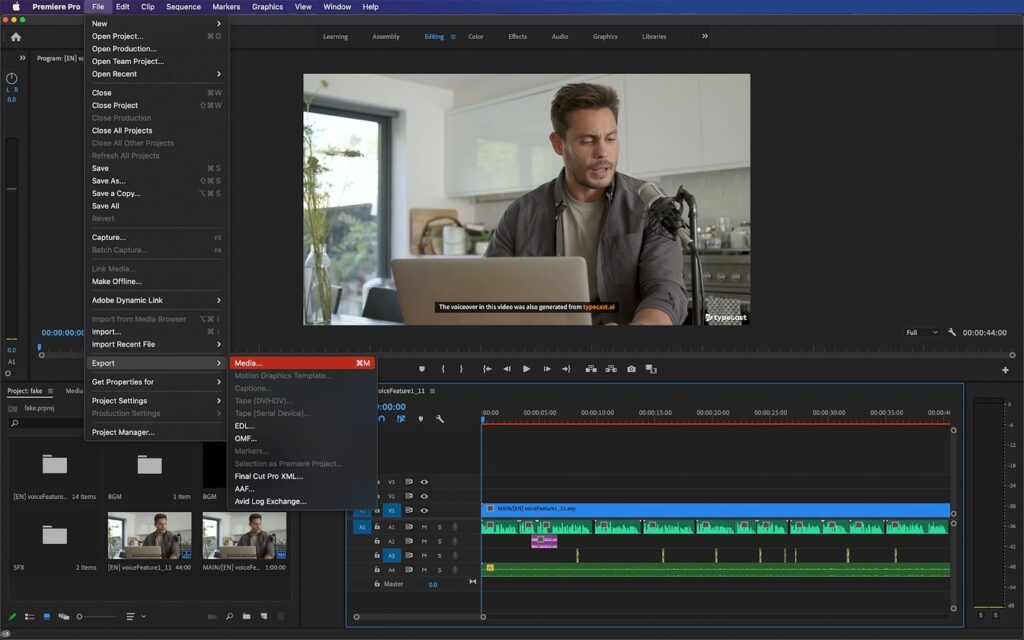
Once you’re happy with your video we can export it for use and actually create a video! Go to File > Export > Media…
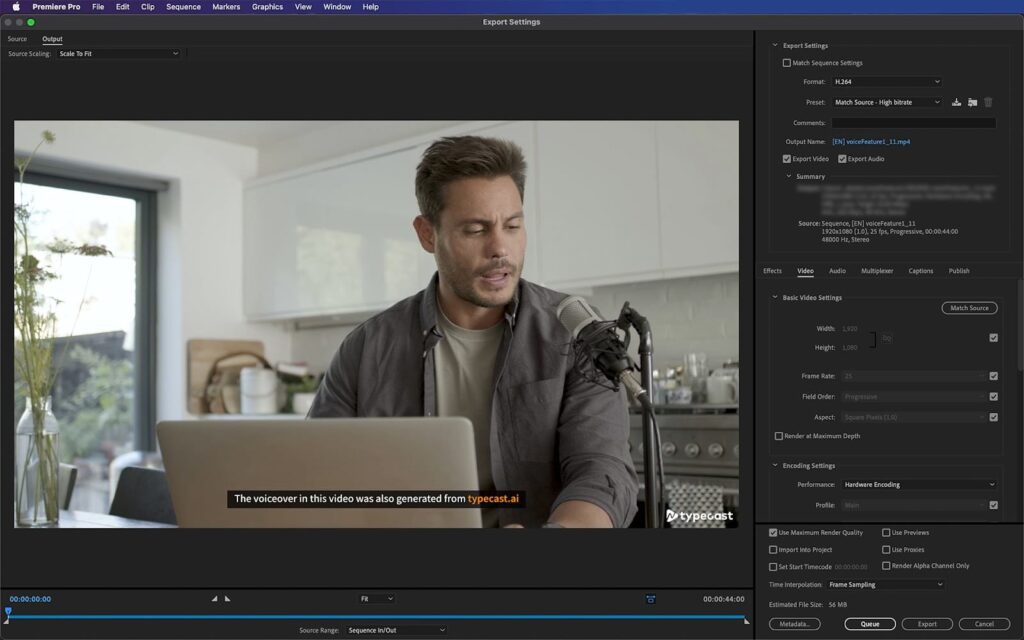
You’ll then be given the Export Settings pop-up menu. There are a couple of settings we should change in order to get a decent optimized video!

If you look at the right hand side, you’ll see a bunch of different settings in the Export Settings box. We can just focus on these for now.
Click on Format and select H.264.
This is the video codec we want to use. Without going into technical detail, this just ensures your video renders as an MP4 that is compatible with most mediums and devices.
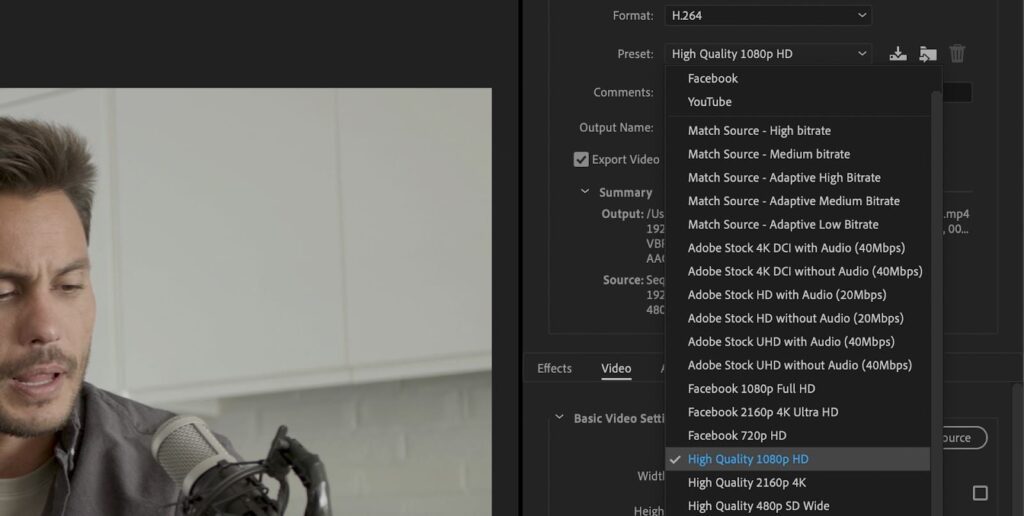
Next setting to change is the Preset.
Click on Preset and select High Quality 1080p HD.
For beginners, this is a good video preset to start off with. 1080 resolution is HD and compatible with almost every platform or service online such as YouTube, Facebook, etc.
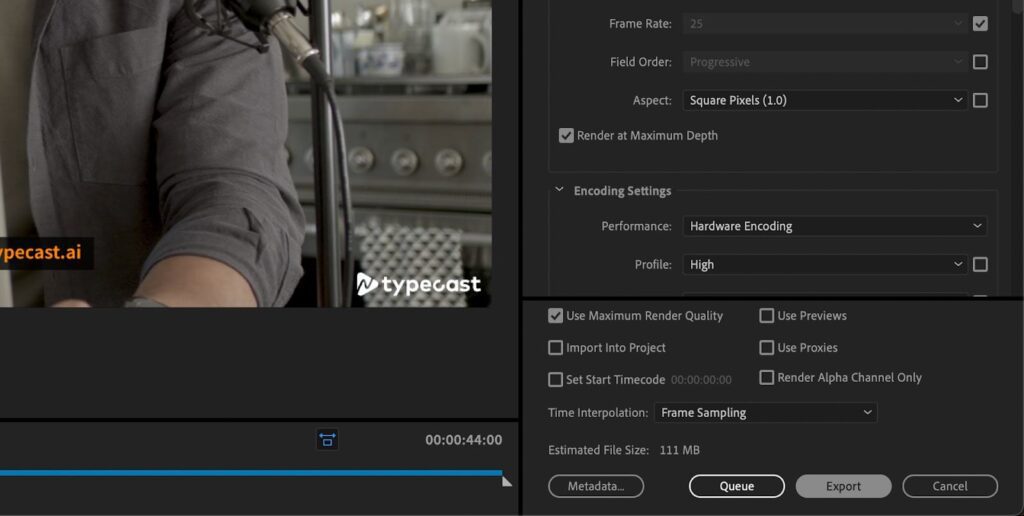
The last setting to adjust is making sure that Render at Maximum Depth (located in the Basic Video Settings box), and Use Maximum Render Quality (located right at the bottom), are both checked.
Finally, click on Export located right at the bottom to export the video. This may take some time.
Once that’s done you’ll finally have a video with an AI voice-over! Feel free to watch and make changes if you need to, or upload online.
If you’re looking for more advanced tutorials in order to step up your video game then stick around for more advanced blogs about video making with AI voices in future!
To see how our own video from this tutorial turned out you can watch it above where we show how natural text to speech can help your video content.